Crack Filling in Wood and Masonry: structural repair with Epoxy Primer and Epoxy Moldable Putty
How to fill Cracks and Holes: a summary of the crack filling method
1. Grind or cut out the crack to make a clean slot at least 15mm x 15mm in section.
2. Remove all dust by brush or vacuum.
3. Prime with Epoxy Primer and place Moldable Epoxy Putty or, for bigger holes, pour in Structural Epoxy Pouring Resin, which is self beveling.
Clicking on a blue Product Name takes you directly to the Order Pageping Page,
Click here to see the products and the prices in our Resins Order Page
How to choose a crack repair method and material
General principle - cut out the cracks with a saw, Router, masonry grinder, or Allsaw, to form square edged slots, and remove all dust and debris.
Avoid V shaped slots. The repair will be much weaker.
Repair Thickness - the more material that we can put in to the repair, in terms of width and depth,
the better it will be able to accommodate natural movements caused by changing temperatures and therefore the better it will last.
Caution - Always consult a Structural Engineer and the building's Insurers before proceeding.
Click here to see the products and the prices in our Resins Order Page
Fine to medium cracks - hairline to 15mm wide.
Cut out to - 15mm to 25mm in width
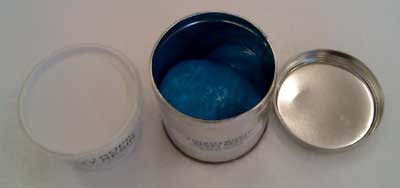
Apply Epoxy Primer liquid by brush and whilst tacky lay in the putty-like repair mortar, Moldable Epoxy Putty.
Epoxy Primer - available in 500cc and 1 litre, two pot, liquids.
Moldable Epoxy Putty - available in 500cc and 1 litre, two pot, putties.
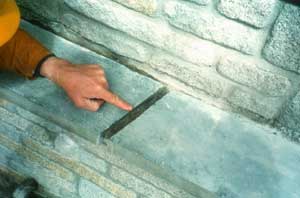
Slot correctly cut out, square shouldered, dust blown out, ready to Prime and Fill.
Click here to see the products and the prices in our Resins Order Page
Larger holes and cracks - over 15mm wide
Cut out to - 20mm plus in width - can fill holes of any size.
Pour or inject Structural Epoxy Pouring Resin.
Structural Pouring Resin - available in 1 litre, 2.5 litre and 7.5 litre packs, containing two liquids and a powder.
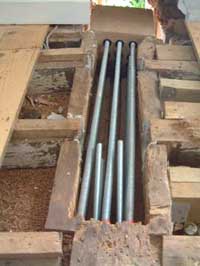
Shutter Box and dug out timber. Pouring Structural Pouring Resin.
Click here to see the products and the prices in our Resins Order Page
For cosmetic matching of colour or texture - you can add your own Site dust or chippings to the surface, (or ask for our Mortar Colour
Powder), which you can mix into Moldable Epoxy Putty, used as a surfacing finish.
Apply Epoxy Primer liquid by brush and whilst tacky lay in the putty-like repair mortar, Moldable Epoxy Putty.
Epoxy Primer - available in 500cc and 1 litre, two pot, liquids.
Moldable Epoxy Putty - available in 500cc and 1 litre, two pot, putties..
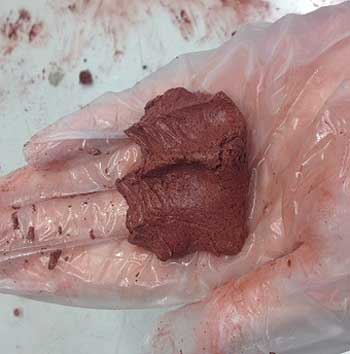
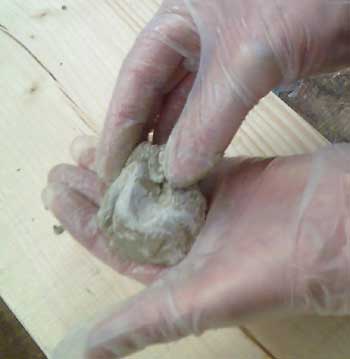
Mixing Moldable Epoxy Putty in the gloved hand. Coloured Red with Colouring Powder.
Click here to see the products and the prices in our Resins Order Page
Brickwork Stitching - masonry stitching with epoxy rods and epoxy resin
Brickwork Stitching - epoxy resin injection method
Cut out every third mortar course 250mm each side of the vertical crack with an angle grinder, to 2/3rds of the brick/block or stone depth.
Remove all debris and dust. Injection a bead of Thixotropic Epoxy Resin or Thixo Rapid One Pack Resin and insert the epoxy/glass rod into the resin.
Push the rod inwards using a screwdriver or a spare length of rod. Apply another bead to cover. Re-point in a matching material.
Always consult a Structural Engineer and the building's Insurers before proceeding.
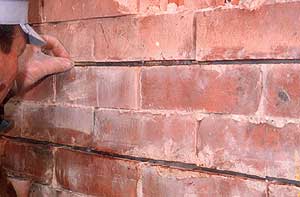
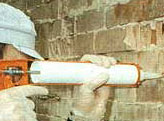
Inserting an Epoxy-Glass Rod Stitch into Thixotropic Epoxy Resin
Fill the vertical crack with flexible Thixotropic Epoxy Injection Resin: available in 400cc packs with cartridge kits, for easy use in a standard skeleton gun.
Thixotropic Epoxy Injection Resin - available in 400cc, two pot, with cartridge kit.
Thixo Rapid Injection Resin - available in 280cc, single tube, fits standard skeleton guns.
Epoxy-Glass Rod - available in 6, 8, 10, 12, 16mm diameters x 1 metre lengths.
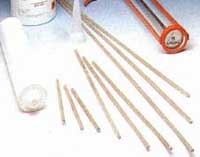
Thixotropic Injection Resin, Epoxy-Glass Bars, 400cc Skeleton Gun
Click here to see the products and the prices in our Resins Order Page
Joint Filling - floor to wall joint repair with primer and cementitious filler
Floor to wall Joint Filling
Cut out the floor to wall joint, in the floor itself, with a masonry grinder or disc cutter, to form a square edged slot and remove all dust and debris.
Wet out the slot with fresh water and prime with BondAcryl.
Cut out to - 20mm plus in width - can fill a slot of any size.
Insert a waterproof pointing mix of either Fillet Seal (supplied as a powder) or BondAcryl mixed with sand and cement (no water).
Fillet Seal Powder - available in 25kg packs, or use Bondacryl with your own washed sand and cement - supplied in 2.5, 5.0 and 25 litre bottles.
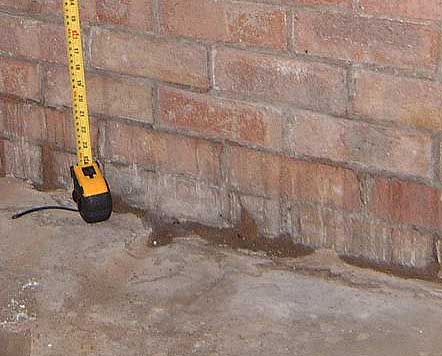
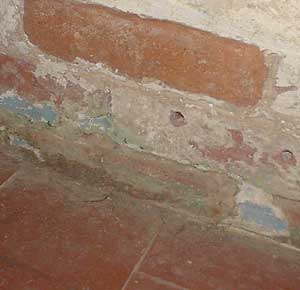
Typical floor to wall joint problems - cut out the floor edge and fill. May require 'tanking' as well.
Mix up a mortar of 4:1 sharp, washed sand with fresh Portland Cement, using BondAcryl instead of water. Apply the mix to the primed slot and finish flush.
Click here to see the products and the prices in our Resins Order Page
Wall Reinforcement - masonry 'stitching' with stainless rods and cementitious mortar
Wall Reinforcement Stitching - cement based grouting method
Cut out the cracks with a masonry grinder to form square edged slots and remove all dust and debris.
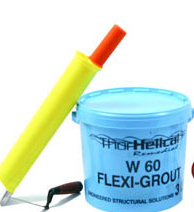
Wet out the slot with fresh water and inject the shrink compensated repair mortar, W60, using the Grout Master plastic applicator.
Insert a length of stainless steel helical reinforcement bar, as per our Method Statement (available free, on request).
Apply further W60 Grout to fill the crack. Finish using the Finger Trowel.
Always consult a Structural Engineer and the building's Insurers before proceeding.
Helical Bar used in Stitching
Repair Steps
Supplied complete as a Crack Filling Kit - Grout Master Applicator, Finger Pointing Trowel, W60 Grout, Mixing Paddle, or the materials and tools can be purchased individually.
Crack Injection - crack stabilisation using injected epoxy resins - injecting hollow patches
Crack Injection
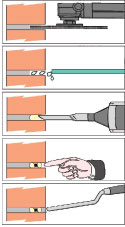
To treat delamination or hollowness, drill a 5mm - 10mm diameter hole into the crack every 100mm to the depth of the separation between layers. (hollow area).
Inject Epoxy Primer or Thixotropic Injection Resin until it exudes from the next hole.
Test for hollowness with a plastic hammer until the delaminated areas cease to sound hollow.

Injecting cracks in masonry using a syringe. Syringes - in 10cc, 20cc and 50cc sizes.
Epoxy Primer Consolidator - available in 500cc and 1 litre, two pot, liquids.
Thixotropic Epoxy Injection Resin - available in 400cc, two pot, gels, with cartridge kit.
Crack Restraint - wall stabilisation using lateral ties
Lateral Wall Ties
The best treatment for external masonry, brick, and stone, that has bulged due to inadequate support.
Always consult a Structural Engineer and the building's Insurers before proceeding.
Steps:
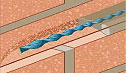
- Check the location of the joists by lifting a floor board
- Drill a test hole to check alignment is central to the joists
- Drill a hole every 500mm along the wall
- Drill through the masonry hole to create a pilot hole in the joists
- Screw the Lateral wall Ties into the joists until below the outer wall
- Inject resin to bond the Ties into the outer wall leaf
- Re-point the holes
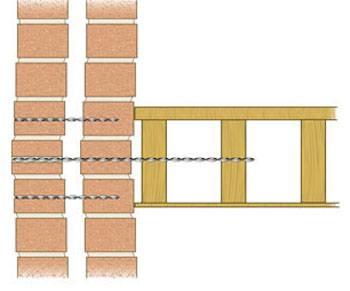
Installing lateral ties to restrain bulging, cracked walls
Available in various lengths to suit different wall thicknesses
Always consult a Structural Engineer and the building's Insurers before proceeding.
Wall crack repair requires an assessment of the building to determine the reason for the cracking.
Wall repair using our Crack Repair Kit or other crack repair products is easy, provided that we have eliminated the underlying cause.
To repair brickwork, repair wall masonry or to stabilise a cracked wall ring for free technical advice.
OUR Order Page
- RESINS Order Page - this Site, for Epoxies and other building repair resins
- TANKING Order Page
- SURVEYING TOOLS Order Page
- MEMBRANE FOR DAMP WALLS & FLOORS Order Page
- FIRE PAINTS Order Page
- RUST CONTROL Order Page
Contact I History I Links I Privacy Policy | Returns Policy I Resins Order Page | Technical | References
Property Repair Systems
T: 01626 872886
E: Mail us help@propertyrepairsystems.co.uk
Site written by: David Moore
David Moore, B.A. (Hons.), C.T.I.S., C.R.D.S. Technical Author
Google+
Other Property Repair Systems Sites:
www.drywallandfloor.co.uk - membranes for lining damp walls, floors, basements and cellars
www.fire-door-paint.co.uk - upgrade doors to 30 minutes fire resistance
www.joist-repair.co.uk - how to quickly repair joists and beams of any size
www.propertyrepairsystems.co.uk - our Home Site
www.steel-fire-paint.co.uk - treat steel with Intumescent Paint to provide fire protection
www.timber.org.uk - systems of repair, with step by step methods
www.timber-repair.co.uk - how to repair timber beams